Showing posts with label artistic lines of nature. Show all posts

Artivism: The Power of Art for Social Transformation

It's been several weeks since I've written a blog post. I think I needed a break from writing then I got busy with other projects and activities while enjoying the autumn months.

But there is one event I wanted to mention: I was honoured earlier this month to make a presentation as part of an Artivism initiative by Adelphi University in New York. They have been arranging a series of guest speaker presentations that demonstrate how the arts can make a difference in creating awareness and for social change. The presentations cover not only visual arts, but also music, performance, community projects and many other initiatives. There are presentations via Zoom most Mondays, and are uploaded to their YouTube page afterwards.

My topic as part of this initiative was Embracing the Natural Art Around us for Self-Reflection and Personal Growth. in which I speak about my how my art represents timeworn and weathered objects around us, both in nature and manmade, and how it can help us find connections and create opportunities for self-reflection, growth and gratitude.

I think it went well, and my friends tell me they gained insight into the meanings behind my art. I invite you to watch the presentation at the link above. I'm pleased that I've had lots of opportunities for public speaking over the last year - all that practice definitely helps. And it really is easier to speak to an audience when it's a subject we are passionate about.

I was referred to this Artivism initiative by my good friend, international tapestry weaver Krystyna Sadej, who made a presentation on Art Made of Recyclable Materials. hHr husband, Andrzej, Paralympic Head Coach and Coaching & Education Director with Judo Canada, will be presenting on Monday, November 21, on Social transformation in the art of judo by developing a program adaptable for the visually impaired, alongside his athlete, Priscilla. Krystyna's daughter, Katarzyna Sadej, international opera and concert and classically trained mezzo-soprano, spoke this past spring about her Earth Singing Project, 


Related Links:


AN ARTIST RETREAT REFILLS MY CREATIVE BUCKET

I have returned home inspired from a week in the wilderness with a group of like-minded, nature loving artists. Waterfalls, lichens, mushrooms, loons, rocks, hikes, swims, time spent creating and capturing the scenery on canvas or camera. A beautiful environment to explore ideas, experiment and create, in a very supportive environment. 

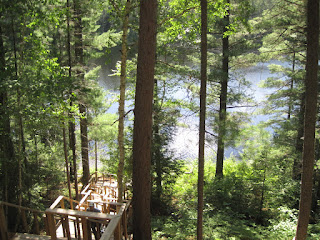
Lac Penniseault
It was a week of inspiring the senses: not just plants and landscapes, but also patterns and reflections; the sounds of loons and their babies, the roaring of the rapids, tent zippers, crackling campfire; the scents of clear air and pine trees; the feel of sand and rocks underfoot and of cooling off in the lake; the taste of local spring water, supper cooked over the fire.

Lac Penniseault - view from the camp

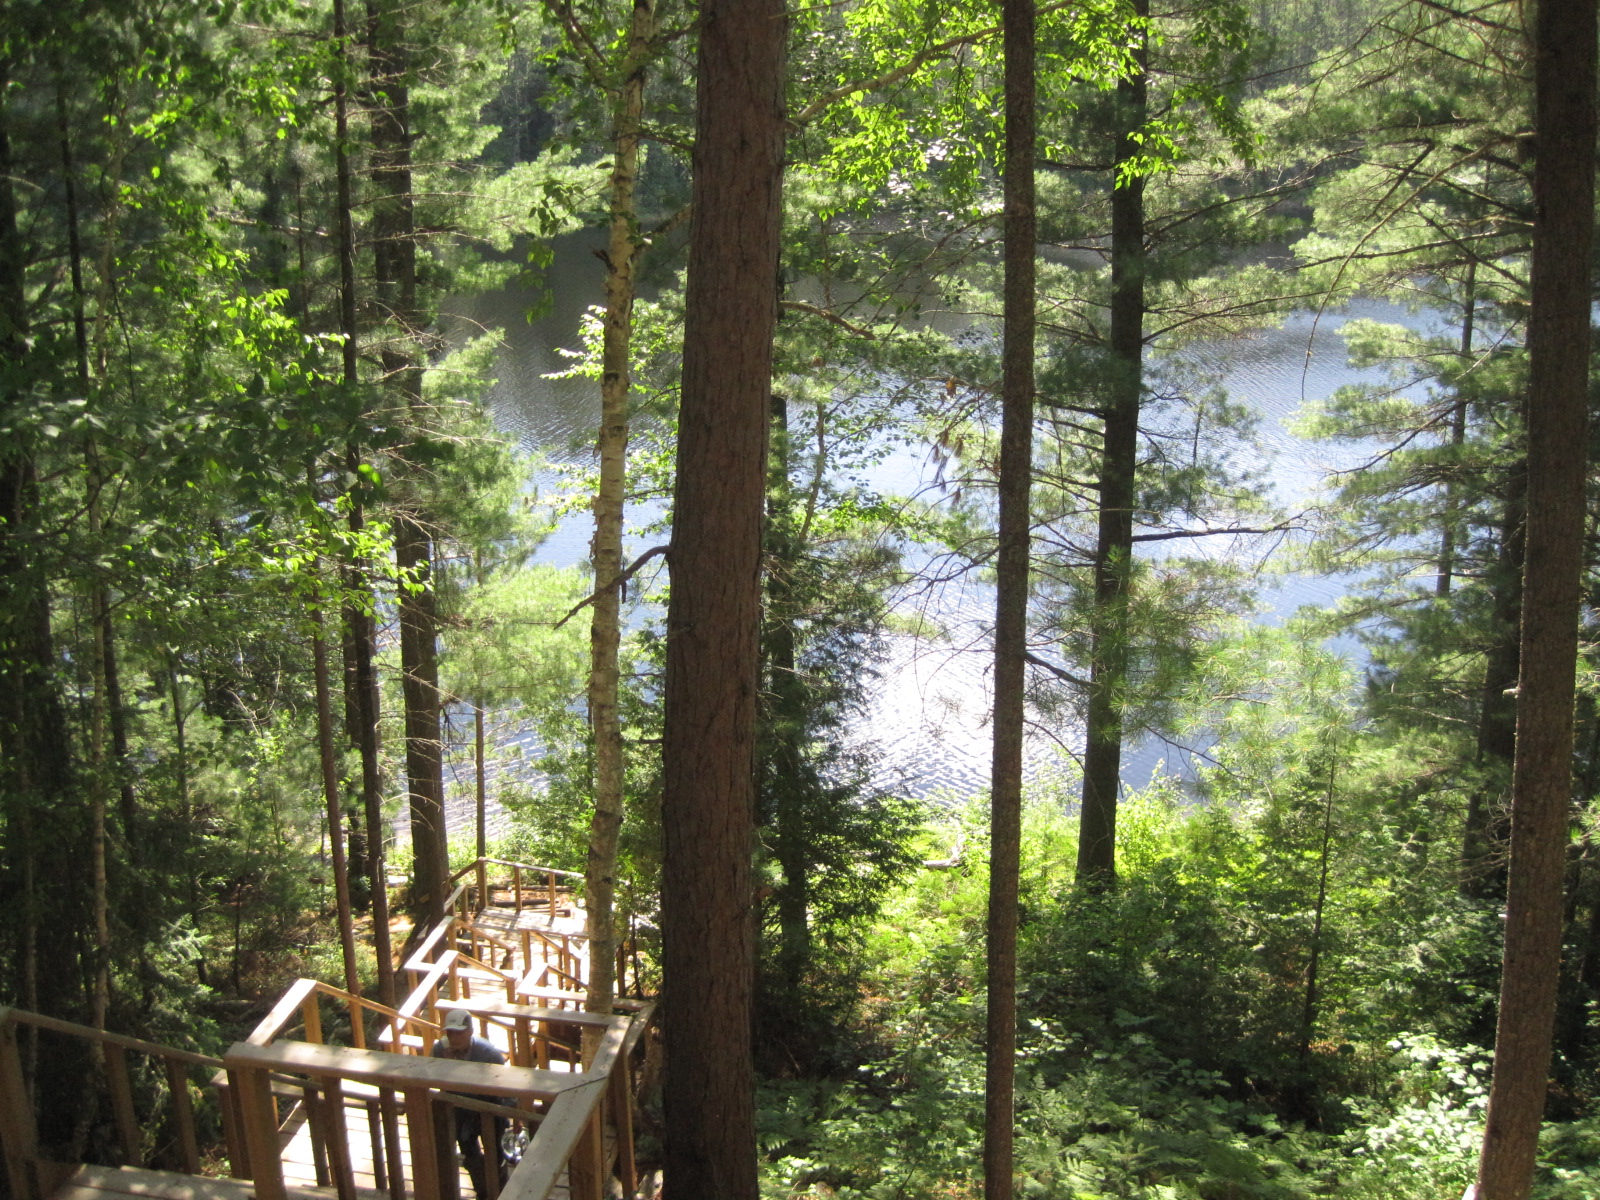
We were 15 artists, spending a total of 7 days together camping in the wilderness of Quebec, thanks to our sponsor, CPAWS (Canada Parks and Wilderness, Ottawa Valley Chapter), at their 5th artist residency, Dumoine River Art for Wilderness Retreat (DRAW). We camped in a beautiful setting with a large area for tents, a campfire pit, deck, eating areas, and a beach 66 stairsteps away (and of course 66 back up). A small barn and woods were ours to explore, finding many old rusted garden and cooking implements and scrap metal pieces, some of which we removed in an effort to clean up the area, but also inspired by the potential of these relics for our own artistic creations. Our disciplines included painters, photographers, a felter, fibre artist, a sculptor, even a sound artist.  

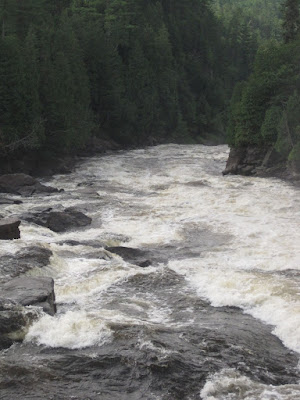
The highlight was visits to the Grand Chutes along the Dumoine River, with its roaring rapids, rocks, and towering trees. The trail along the river offered up a surprising number and variety of lichens, mosses and mushrooms. The feel of the area was magical, leaving us wondering if this was the world in which faeries live. The Dumoine is a protected wilderness area in the province of Quebec, and one which needs to be protected from further climate change and biodiversity loss. 

Dumoine River

Trail along the Dumoine River. Could faeries live here?

I have well over 350 photographs from this trip, including an excursion we took up a mountain where a new hiking trail is being forged, and of wildlife and an abandoned building nearby. We fortunately did not see any bears or wolves or moose.

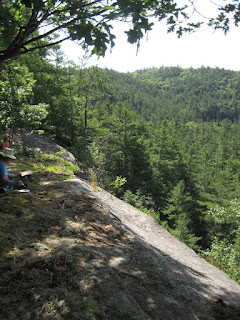
Blueberry Mountain
I have lots of plans in my head for making fibre art pictures from this adventure, including 3 I started during the trip. I was also able to spend time experimenting with more sun printing on fabric, paper and birch bark, testing leaves I had not tried before with varying results. These too will somehow get incorporated into art. I was delighted when some of the artists asked to learn this technique - below is a shirt one artist decided to print on - a synthetic material that actually turned out quite well.
Sun Printing

Sun Printing on Birch Bark
My idea bucket is now very full. I am inspired. We had time to create, time together inspiring and sharing, also time alone to reflect, think, journal and work on our art. And each of us will be creating and donating a piece of art based on the area to help raise awareness of the importance of protecting our parks and wilderness areas.


SUN PRINTING HOW-TO INSTRUCTIONS

When I decided to try sun printing in preparation for my upcoming artist residency, I found many sites with only brief instructions, and only a couple with more detailed information on possible surfaces and paints. Thus began my experimenting, as I wrote about in last week's blog post. 

So, for those who wish more than just the basics, here is the step-by-step process, and some of the tips & tricks I learned along the way.

Supplies

  • Materials to print on:
    • A light coloured cotton fabric works very well. I tried other surfaces such as old sheets, linen, felt, cotton rag paper, watercolour paper, rice paper, brown paper bags, mineral paper (the blue print shown here at the right was done on mineral paper), and other papers I had on hand. Experiment with whatever materials you have available as each gives a different effect.
  • Acrylic or fabric paints
    • Liquitex soft body acrylics and Pebeo Setacolour light paints (transparent paints) were highly recommended for this technique. Other paints may work, but I have not tried them. 
  • Sponge brushes or paint brushes
  • 3 water containers (margarine tub size is fine)
    • 1 to rinse brushes
    • a 2nd for clean water to add to your paint
    • a 3rd for wetting fabrics  
  • Flat surface for your paper or fabric, and on which to leave your sun prints to dry (not wood - as the wood will absorb some of the water from your fabric or paper)
  • Materials for the printing - leaves, stencils, heavy objects - these need to adhere well to your fabric or paper
Directions
  • Prepare your paint: it needs to be diluted with water at about a 1:1 ratio so it flows well. I mix just a little bit of paint at a time as it goes a long way. Paper cups or a watercolour paint tray works well. 
  • Wet your fabric in a bowl of water and squeeze out excess. Lay flat on your surface and try to eliminate air pockets. If using paper, brush on water in both directions, ensuring it is well saturated. Papers such as brown paper bag absorb a lot of water, so it's best to dip it into the bowl of water, scrunch, squeeze out excess water, then lay out. If it's not wet enough, the paper will  dry too quickly. The scrunching effect can leave some lovely lines on your surface.
Brown Paper Bag - wet and scrunched prior to adding paint.
This gave a slightly mottled background with faint lines, an effect I quite like. 


Other surfaces, such as this Tyvek envelope do not absorb water - the thinned paint will sit on top. A little paint will go a long way.

  • Try using a mordant (optional) - I dipped some of my fabrics in a rust mordant after wetting. Does it make a difference? I have not yet tested that, but it may alter the final colour slightly. I also tried dipping leaves in the mordant. 
  • Paint your surface with 1 or 2 colours - I like to pour on just a bit of paint then spread it out. A little can go a long way. You'll find different paint colours will give you different results, so experiment with various colours, and mixing colours.
Try unusual materials like birch bark - soak first for about 30 minutes.
In this example I used Liquitex soft body acrylic paint. 

  • Press the leaves or stencil onto your surface, making sure the edges have good adherence. The better the contact, the sharper the lines will be. You could also try objects like old washers or bolts.
  • Place in the sun and let dry for 1-2 hours. I had to mist a few pieces, but they likely were not wet enough to start. The printing also seems to work on cloudy days so I'm not actually sure how important it is to be directly in the sun.
  • Once dry, remove the leaves or stencils and other objects.
  • Record your results - otherwise you may not remember what paint or objects worked on what type of material.
  • Heat setting is next - fabric can be put in the dry on high for 1 hour - or can be ironed on the back side between layers of parchment). Paper can be ironed too, between layers of parchment. Hand washing of fabric may be needed if there is excess paint and if it's for an item that will be worn or for pillow cases or placements. I have yet to iron any of my pieces, rather I have let them sit for a week first. And since I used Tyvek for a couple of my experiments, I won't be heat setting it, since it reacts to heat.  
    This red and yellow one was on Tyvek fabric using Liquitex soft body acrylics and fern-like leaves - it turned out absolutely fabulous. We typically use some kind of heat (and often stitching) on Tyvek, which will significantly change the look. Not sure I'm ready to try that just yet. I'll wait to decide what to do with this sample.


The fun with this technique is the experimenting - and taking risks with various materials. 
Next I need to figure out what I'm going to do with all my samples. I will be doing more testing at my upcoming artist residency later this month....

Related Post:


SUN PRINTS - AND AN UPCOMING ARTIST RESIDENCY

Delighted to announce I will be taking part in a week-long artist residency at the end of July through the Dumoine River Art for Wilderness Retreat, sponsored by the Canadian Parks and Wilderness Ottawa Valley Chapter. The retreat includes 15 or so artists using a variety of mediums from felting to photography to painting to storytelling. We will be creating art en plein air, inspired by the rugged beauty of the area.

The goals of the retreat are to:

  • learn more about conservation, to be inspired by the richness of the area
  • create art that supports CPAWS-OV's conservation work, and
  • raise awareness of the important of parks and protected areas in halting and reversing climate change and biodiversity loss. 

My personal goals at this residency are to:

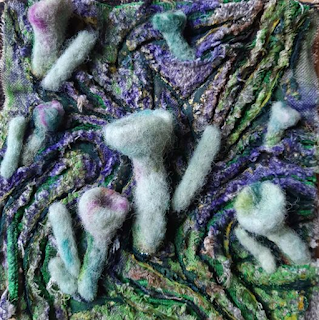
  • create small fibre art pieces to document parts of the landscape: the lines in nature, decay, tree bark, lichen, rocks, and more 
    • I also plan to do some sketching and take oodles of reference photos to continue this goal later on, plus record my impressions about the land, colours, textures and other thoughts, and 
  • experiment with sun printing on fabric and paper. We won't have electricity at this retreat, so steaming my fabric to eco print won't be an option. Instead I'll use the power of the sun. 

In preparation for sun printing at the retreat, I googled this topic looking for information such as which paints and materials work best, since I can bring only a limited amount of supplies. I found only a handful of blogs where the writers have experimented beyond the basics. Cotton fabric was highly recommended, and 2 types of paints: Pebeo setacolor for light fabrics (a transparent paint) and Liquitex soft body acrylics. Some also recommended using mordants such as alum or rust. 

Here is what I have tried so far as I began experimenting prior to the retreat start:

  • White cotton and cotton rag paper: I treated both with alum in advance, then painted  with Setacolor paints. The fern leaves have good contact with the paper and fabric, helping to ensure sharper edges in the final print. I left these to dry for about 2 hours. 


Below is the result on the cotton fabric - this was on an old, embroidered cloth:


This was the result on cotton rag paper, much more subtle, yet I do quite like the effect:


  • Next I tried a scrap from an old yellow cotton sheet, putting it into a rust mordant first, then painting it with the Liquitex soft body acrylics. I  am very very pleased with the result:

  • Old linen, treated first in a rust mordant, turned out beautifully using red and orange Liquitex paints:


  • Rice paper, painted with the Liquitex soft body paints. I had no idea how this would turn out. It's subtle, yet soft looking, and I think has wonderful potential as a background or perhaps with some stitching added: 


  • Yupo paper was next on my list to try, and is my favourite so far. Yupo is a synthetic paper, very smooth, and often painted with alcohol inks. For this experiment, I tried Setacolor paint, with surprisingly pleasing results. I love that the veins of the leaf show up, and that the print left a solid line around the leaves. I will definitely experiment with more on this paper and already have a project idea in mind:


  • These next two are on watercolour paper using Setacolor paints, also with interesting effects. I'll be trying this again to see if I get similar results:


So, what's next? 

I've had fun with these experiments - and will try different leaf and plant types to see which will provide good contact with the materials. I also plan to try bleeding tissue paper and printing  on materials such as mineral paper (made from rocks), Tyvek, brown paper bag, old newspaper, and more. I will let you know how they turn out in the next couple of weeks, as I narrow down my supply list for the retreat. I may even try some solar dyeing in mason jars. 
Out of interest, I found a reference to an article in Quilting Arts Magazine, summer 2006, about sun prints on tissue paper. And I just happen to have that issue in my magazine stash.
Stay tuned!

FINDING NATURE'S ARTISTRY - AND WEIRDNESS

I'd never heard of a derecho thunderstorm until last week when one hit this part of the country. 110+ km/hour winds gave way to hundreds of toppled and broken trees in my area. So many old and beautiful trees lost, including 8 on our property. We were among the lucky ones who had very little damage to our house and were without power for only 4 days. We did have to bring in a team to finish taking down broken trees, and spent hours cutting up and clearing branches around our house and the neighboring homes.

While taking photos to document the damage and destruction, I started to notice some of the artistry - and weirdness - of nature in the piles of wood and branches. I decided to try to capture some of this artistry as part of this record, perhaps to interpret into fibre art in future as a further reminder of the destruction - and the beauty revealed - from such a powerful storm.

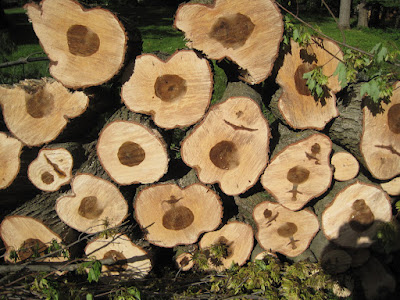
Pile of wood awaiting removal


Lichen covered branch - can you spot the three different types?


Do you see a knot - or an eye?


I took this photo because of the lines in this broken tree stump -
and didn't notice until afterwards the photobombing bee!


I'm pretty sure this is Slime Mold - one of the weirdos of the forest. Although I had heard of it, I don't think I had ever seen it - until now. Like a blob, wet looking, a wee bit gross in fact, yet fascinating all the same. Not sure it will be part of any future art piece though. 


It definitely pays to keep one's eyes open - the more you look, the more you see, and learn.
Respect for nature, respect for storms, and a definite high respect for all the hydro workers, workers clearing trees and branches, volunteers, neighbours helping neighbours during these difficult days. 

WHY LINE IS IMPORTANT IN ART

Lines, one of the design elements in art, are descriptive, the backbone of a design. They help to move the viewer's eye around a piece, can convey texture, be musical, or quiet, are harmonious or add vibration. They can be lazy, energic, elegant, rhythmic, and demonstrate emotion - picture an angry line versus a happy line. 

Lines can be hand sewn, continuous, dotted, smooth or ragged, machine sewn, couched, needlefelted, beaded, woven, painted....

Lines are everywhere, if only we take the time to look: the veins in leaves, the marks left by the ash borer beetle on an ash tree, the rings in tree wood, even the edges of stones or ripples in water. In reality the lines on stones and the water don't exist, it's the transition from one surface to another that we see, examples of outlines or contour lines that help form a shape. 

My sew and slash technique is all about lines - and contrast added using colour and texture. My best works are 4 to 6 layers of fabric. And sewn lines, lots and lots of sewn lines, with slashing between the lines through the top layers. After washing and agitating the fabrics, I am left with surprises about how the fabrics fray and fold and twist, showing off the multiple layers. The thread colour matters - sometimes I want it to blend in, other times I want the contrast. And I sometimes add more lines through beading or couching on yarns or bits of fabric. This piece below was based on the lines in a weathered and discoloured piece of corrugated cardboard. 


Horizontal lines in our art convey a serene point of view, although at times can be static. Vertical lines move the eye, while imparting strength and growth and stability. Diagonal lines add movement, as do meandering lines, spirals, and radial patterns.

The two examples below, both based on Van Gogh's Starry Night, demonstrate how lines can lead the eye. The first example is circles from metallic transfer foil, with stitching on and around the foil. Compare this to the second picture, also using transfer foil and stitching on the circles, but with the stitching leading from one circle to the next. Did you find your eye following that stitching to the next circle, then back again?

The first example was not planned, and when I realized the circles were disjointed and the picture static, on the next piece I changed the stitches to lead from one circle to the next. Much better, don't you think, to guide the eye?


Lines going in two or more directions add much more interesting than when they all go in one direction. This example has lots of horizontal and vertical lines, long and short, not perfectly straight but meandering just a bit. Even the short stitched lines add a needed embellishment to the background. Repetition of lines in this example was key to making the piece work. 

There are oodles of examples of lines in nature and manmade. The artistic eye begins to see, not just objects, but the lines all around us. Try making small (postcard size) examples of the lines you spot, and exploring how the addition of lines, whether stitched, couched, felted etc. can make a difference in moving the eye, defining a focal point, adding vibration and energy, or just a slow, meandering, meditative touch.

A FIBRE ART WASP NEST

One of my fibre art goals this past year has been to create three dimensional work. I'm pleased to say I'm learning more with each piece I make, but this one I'm most pleased with to date. I've been experimenting with various materials that could provide a solid and sturdy structure for 3D work, including layering techniques, foam, wire, metal, cardboard, and other lightweight items. Most recently I tried buckram, used in wearables such as hats and costumes and for items such as bags and totes.

My plan was to make a wasp nest from a variety of recycled fabrics: lace, linen, old sheers, cottons, on a base of buckram, and in shades of beiges and greys. I tore long strips of each, machine stitched the strips together down the middle and on both sides, then cut through to show the layers below. I then handstitched the strips together while forming them into a circular shape, tacking some layers back to show the textures and colours below even more. The buckram gave the structure the strength and flexibility needed so I could form it into the typical spherical shape of wasp nests. 

Since real wasp nests look papery and are made from a wood pulp (the wasps chew wood into a pulp then stick it together with saliva), I added a few small pieces of birch bark as an embellishment. 

As I pondered how best to display my fibre art wasp nest, the idea to hang it from a branch seemed perfect. I checked out TextileArtist.org to review their article on hanging and displaying textile art, and first tried attaching invisible hanging wire to the branch. But after finding the wire difficult to work with, I instead used a cord that was in my stash that has a similar organic look to fabrics used for the nest. And as the nest is very lightweight, it worked perfectly.


TURNING NATURE'S ARTISTIC LINES INTO FIBRE ART

I've written only 2 blog posts since the pandemic started in my area. Like me, many of my artist friends felted blocked from creating for the first few months. Other than simple projects and finishing others, my focus turned to the outdoors, lots of walking, and to some projects around the house. Over time I did manage to get back into a creative mode, which for me is therapeutic. And while I haven't completed many new fibre art pieces, I have been able to play and experiment which is leading me in a wonderful new direction. 

Writing - and blogging - also felt like a chore. The enjoyment was lost. But I think I'm now getting my groove back and my hope now is to post once or twice a month. But if I don't, I plan to not feel any guilt. What matters is that I continue to create.

But I digress.

Two of my three posts since the virus hit here were about the faux chenille technique, otherwise known as fabric slashing. This is the technique I've been playing with, experimenting with various fabrics and some interesting materials, with adding dimension and embellishments. 

But to back up a bit first, having spent much time outdoors over the last months, I really began to look for and "see" the lines in nature - very artistic lines - which I am now attempting to translate into my fibre art.

This piece was based on the marks of the emerald ash borer on the ash tree. It's sad how many of these beautiful trees have been lost, yet the marks of the ash borer do have a certain beauty, a beauty I've tried to capture here. I used 7 different fabrics, sewing, cutting and tearing, heat distressing, and adding hand embroidery. 

Ash Borer Designs Fibre Art


Adding some dimension to this fibre art rose was trickier than I thought it would be. It was too flat at first after mounting it onto canvas, so I added some batting behind the middle sections, adding a bit of surface shape. It turned out not too badly I think. Next time I would add the batting and scrunch the surface more before mounting. 


I'm very pleased with this piece below. It's based on a piece of corrugated cardboard (see photo) that had been outside our shed in all types of weather. The colours and patterns on the distressed cardboard captured my attention, and I then interpreted it into this work,. It had 7 different fabrics: old cottons and linen, denim, a piece of indigo & rust dyed cotton, tulle, and a metallic fabric all mounted on a black felt background. Some beading completed the piece to add some of the smaller marks. This was the first time I had worked with denim, a fabric I will definitely use again. It goes with everything, as we know from wearing blue jeans, is soft and has a beautiful nature colour. 


There are others I've been experimenting with, incorporating alternative materials, and adding embellishments, in both 2D and 3D formats. I'm not there yet, and at least one project has me has overwhelmed. So I'm also turning for now to smaller dimensional works that are quick to finish, using these same techniques. But more on that in a future post.

Stay creative!

TYVEK EXPERIMENTS FOR 2026

Although I'm not a quilter, I am a fibre artist and do a lot of machine sewing, mostly random, improvised lines and some free motion. My...