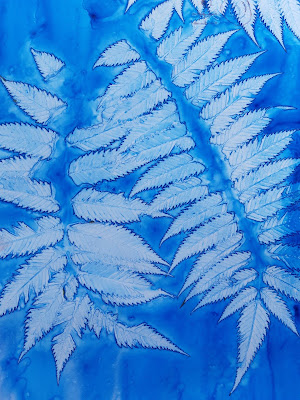
So, for those who wish more than just the basics, here is the step-by-step process, and some of the tips & tricks I learned along the way.
Supplies
- Materials to print on:
- A light coloured cotton fabric works very well. I tried other surfaces such as old sheets, linen, felt, cotton rag paper, watercolour paper, rice paper, brown paper bags, mineral paper (the blue print shown here at the right was done on mineral paper), and other papers I had on hand. Experiment with whatever materials you have available as each gives a different effect.
- Acrylic or fabric paints
- Liquitex soft body acrylics and Pebeo Setacolour light paints (transparent paints) were highly recommended for this technique. Other paints may work, but I have not tried them.
- Sponge brushes or paint brushes
- 3 water containers (margarine tub size is fine)
- 1 to rinse brushes
- a 2nd for clean water to add to your paint
- a 3rd for wetting fabrics
- Flat surface for your paper or fabric, and on which to leave your sun prints to dry (not wood - as the wood will absorb some of the water from your fabric or paper)
- Materials for the printing - leaves, stencils, heavy objects - these need to adhere well to your fabric or paper
- Prepare your paint: it needs to be diluted with water at about a 1:1 ratio so it flows well. I mix just a little bit of paint at a time as it goes a long way. Paper cups or a watercolour paint tray works well.
- Wet your fabric in a bowl of water and squeeze out excess. Lay flat on your surface and try to eliminate air pockets. If using paper, brush on water in both directions, ensuring it is well saturated. Papers such as brown paper bag absorb a lot of water, so it's best to dip it into the bowl of water, scrunch, squeeze out excess water, then lay out. If it's not wet enough, the paper will dry too quickly. The scrunching effect can leave some lovely lines on your surface.
 |
| Brown Paper Bag - wet and scrunched prior to adding paint. This gave a slightly mottled background with faint lines, an effect I quite like. |
 |
| Other surfaces, such as this Tyvek envelope do not absorb water - the thinned paint will sit on top. A little paint will go a long way. |
- Try using a mordant (optional) - I dipped some of my fabrics in a rust mordant after wetting. Does it make a difference? I have not yet tested that, but it may alter the final colour slightly. I also tried dipping leaves in the mordant.
- Paint your surface with 1 or 2 colours - I like to pour on just a bit of paint then spread it out. A little can go a long way. You'll find different paint colours will give you different results, so experiment with various colours, and mixing colours.
 |
| Try unusual materials like birch bark - soak first for about 30 minutes. In this example I used Liquitex soft body acrylic paint. |
- Press the leaves or stencil onto your surface, making sure the edges have good adherence. The better the contact, the sharper the lines will be. You could also try objects like old washers or bolts.
- Place in the sun and let dry for 1-2 hours. I had to mist a few pieces, but they likely were not wet enough to start. The printing also seems to work on cloudy days so I'm not actually sure how important it is to be directly in the sun.
- Once dry, remove the leaves or stencils and other objects.
- Record your results - otherwise you may not remember what paint or objects worked on what type of material.
- Heat setting is next - fabric can be put in the dry on high for 1 hour - or can be ironed on the back side between layers of parchment). Paper can be ironed too, between layers of parchment. Hand washing of fabric may be needed if there is excess paint and if it's for an item that will be worn or for pillow cases or placements. I have yet to iron any of my pieces, rather I have let them sit for a week first. And since I used Tyvek for a couple of my experiments, I won't be heat setting it, since it reacts to heat.


No comments:
Post a Comment