Showing posts with label fibre art. Show all posts

TYVEK EXPERIMENTS FOR 2026

Although I'm not a quilter, I am a fibre artist and do a lot of machine sewing, mostly random, improvised lines and some free motion. My thanks to Andree at Quilting & Learning - What a Combo! for hosting a linkup party to talk about goals and plans for 2026.

I started experimenting with Tyvek in the fall of 2025, after doing only a bit a few years back, monoprinting onto Tyvek, then layering with synthetic fabrics, sewing them together, and using a heat gun and/or soldering iron to melt back some of the layers. My focus has been mostly on leaves, inspired by fall colours, decomposing leaves, and especially ones eaten up by insects, leaving a beautiful skeleton leaf, and by the green and purple leaf shown here that I stumbled across on a local trail.


My process starts with gelli printing leaves and other natural materials onto the Tyvek, sometimes painting the Tyvek first. I may need to invest in a larger gelli plate to accommodate some of the items that are on my list, such as the tree trunk from a fallen tree that has those wonderful life lines. My current gelli plate is 8x10, and I think I need one of those new 18x24 plates. 

These are some of my leaves, the first photo showing some of the detail. I used floral wire wrapped in sari silk ribbon to make the stems.


My plans and goals for 2026 include more Tyvek leaves: different kinds, shapes, and experimenting by combining the Tyvek with other fabrics such as burlap,  rusted fabrics, adding fun yarns, painting with Inktense coloured pencils plus whatever else I can think of. 

And tree bark using Tyvek - the variations in colour and textures are yummy. As are trees that have patterns made from the ash borers. 

I have ideas for wabi sabi art, as I love the look of weathered wood, peeling paint, old stone walls and so on. Repurposed Tyvek is perfect for this. And I have lots of discontinued upholstery samples donated by a local furniture store to use up - these are perfect for the base for Tyvek art, adding texture and contrasting colour and patterns. 

What I'd really love is to spend time at a cottage or residency this summer where I can immerse myself in creating for a couple of weeks, away from distractions of home and other commitments. Someplace where I can find inspiration from local plants and other materials, and make enough pieces to be able to apply to some gallery shows.

There you have it, my direction for 2026. What are your creative plans for this year?

To see more of my Tyvek leaves and art, see my last blog post at https://annewarburton.blogspot.com/2025/11/tyvek-art.html


ART FROM THE ART RETREAT + SUN PRINTING LEARNINGS

One of my goals at the DRAW (Dumoine River Art for Wilderness Retreat) was to experiment more with sun printing - but before I get to that I wanted to share one of the pieces I finished this week based on a portion of rock canyon wall along the rapids of the Dumoine River and the reference photo I have been working from. 


This has 5 layers of fabric (upholstery material, organza, tulle, cotton, and felt) sewn together, then slashed, working as an ensemble. The slashed parts represent the crevices in the rocks, other areas are cut back to reveal the variation of rock colours and erosion. I added modified French knots to intensify the crevices and build contrast, and French knots in green where plants were thriving on this rock wall. A small sparkly stone also made its way into this art piece, and a hint of metallic gray and white paints to further enhance some areas of the rocks. 

I have several more pieces planned using similar layering and embellishing techniques, based on these photographs from the trip (and more not pictured here):


But now, on to the sun printing and what I learned:

  • I've been working mostly on mineral paper (paper made from rocks by Yasutomo Inc.), quickly becoming my favourite background to print on with good results so far. I have also been experimenting with old cotton fabric, birch bark, and Yupo paper.
  • My experiments with birch bark prior to the retreat worked out well, but not so well at camp. Both times I soaked the bark in water for an hour. The difference is that at home I ironed the pieces between layers of parchment which stopped the edges from curling and the paint from pooling. At camp, although I tried clamping the bark to a backing board using clothespins, it still insisted on keeping its curls and waves. 
Birch leaves on birch bark
  • With some very hot weather at camp, my painted fabrics and bark dried too quickly and I did not have a spray bottle with me to mist the materials. Some of the prints failed, others were not as bright as expected. The mineral paper however seemed to march to the beat of its own drummer: even though the paper appeared dry, upon lifting the leaves I discovered a fair bit of liquid remaining, drying only after removal of the leaves.  
  • Fern fronds, maple leaves and sumac leaves have consistently worked well on all the surfaces I tried. Others I tested at camp included milkweed, birch, sweet woodruff, and sweet fern, with only the sweet fern giving good results. Thin and freshly cut leaves really do seem to adhere the best on the background. At some point I will test ironed and frozen leaves too. 
  • Natural inks yielded interesting results, especially on Yupo paper. I wasn't pleased with the ink on the birch bark, so overprinted with paint after returning home. Good to know this option can work. 
Printed using a natural ink, then overprinted with soft body paint and fresh leaves
 
Indigo ink on Yupo paper


Related Posts:


HAVE YOU TRIED YUPO PAPER?

Yupo paper is a synthetic made from polypropylene - it's waterproof, very smooth, tree-free and well known for its use with alcohol inks and watercolours and dry media too, recyclable, and considered an environmentally friendly substrate. It comes in white and translucent. It's often used in product packaging, as banners, menus, signs, waterproof maps and more. 

Although I had briefly tried Yupo paper a few years back, it's only now that I'm really beginning to experiment with it.

Alcohol inks are the most popular mediums used on Yupo - google "Yupo paper", and alcohol inks will come up multiple times. Markers work great too, as do watercolours. The inks and paints flow around on the paper, it's important to let the paints do what they want and not try to control them too much. A fixative should be used with paint to protect your final "painting"

But what about uses in fibre art? Here is what I have tried so far:
  • Sewing - very easy by hand and with my sewing machine
  • Sun printing - in this experiment I used Pebeo setacolour inks (see post here for more info on sun printing)

  • Metallic transfer foil - using glue and an iron - the heat causes the Yupo paper to ripple, an effect that could be favorable depending on the outcome you are seeking

  • I also tried sewing Tyvek fabric to the Yupo, then used a craft heat gun to distress the Tyvek. The heat created wonderful wrinkles as well as melting in some areas (be sure to do this outside so you are not breathing in any fumes from the Yupo). 

  • A soldering iron was next - I found some interesting pictures on Pinterest of Yupo painted with alcohol inks and using a soldering iron to make holes of varying sizes.  The picture below was just a quick experiment to make a few small holes and determine how much control I would have over the sizes of the holes (as above, be sure to use the soldering iron outside or a mask to protect yourself from any fumes).


  • Yupo paper can be easily folded - its strength provides potential for book arts, or maybe even pop-up cards. This could be fun to play with.
I also found an example of a basket made with Yupo, in an interview between the World of Threads Festival in Toronto and a basket maker. Scroll about halfway down to see her diagonal twill basket called "Onyx", created using only Yupo paper, acrylic paint, and waxed linen thread. (All her other baskets were made using watercolour paper.) I like that she commented in the interview that she consistently asks herself "If I do X, what will be the result?"

We are just beginning to tap into the potential of this paper, I think, as fibre artists. I purchased a pad of the translucent, rather than white, and plan to begin using some in my art in the coming weeks. Results to follow.

IT TAKES A VILLAGE....

According to thefreedictionary.com, the meaning of "it takes a village"  is 

"Many people's help or involvement is needed to achieve some goal". 

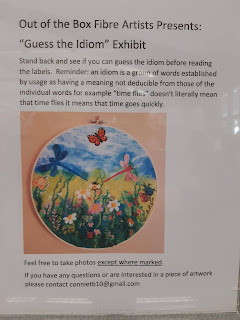
While helping set up an Out of the Box Fibre Artists exhibit earlier this week titled "Guess the Idiom", I was reminded how each time a group of volunteers comes to set up a show, we just seem to just step into the various role without discussion, without assignment, offering our strengths, willing to try a new task, to get the job done and make the best display possible of the art that has been entered into the show.

It doesn't seem to matter if it's a group who has worked together before or if we have new volunteers. We just rally together towards a common goal.

We listen to each other, ask for input, see what each other thinks about a particular arrangement, if one piece looks best next to this one or that one, is one hung too high or too low, are some hung too close together, is the order of pictures conducive to showing each at its best. 

Each time we set up a display, we seem to add a new skill to our skill set. We get new ideas on where to place a tag, a new angle when taking photos, something to add to our toolbox. It just happens. We come together to find the best ways, sharing our knowledge and experience, each contributing our own unique vision, perspective, strengths. 

No one person did more - or less - work than any other. It was a team effort.

We enjoyed seeing the pictures in this exhibit "Guess the Idiom". It was a fun theme, leaving us feeling good, lots of smiles (even with masks on we could see the eyes smiling), appreciating the work and creativity we were witness to. 

As we undertook a final task of finding the best angle to photograph a piece  in a glass cabinet, an alternative perspective was suggested. In awe once again at how well we had pulled together as a team, I shared with the team that the idiom that had come to my mind about our synergy was "It Takes a Village"".😀 There was agreement all around. 

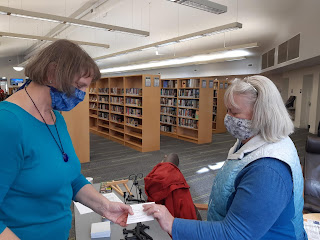
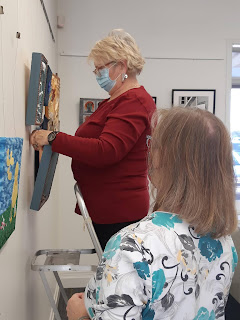
Here are a couple of pictures of some of our amazing volunteer team and a photo of one of the exhibit sections. The show is on through November 29th at the Stittsville Public Library in Ottawa.


WHY LINE IS IMPORTANT IN ART

Lines, one of the design elements in art, are descriptive, the backbone of a design. They help to move the viewer's eye around a piece, can convey texture, be musical, or quiet, are harmonious or add vibration. They can be lazy, energic, elegant, rhythmic, and demonstrate emotion - picture an angry line versus a happy line. 

Lines can be hand sewn, continuous, dotted, smooth or ragged, machine sewn, couched, needlefelted, beaded, woven, painted....

Lines are everywhere, if only we take the time to look: the veins in leaves, the marks left by the ash borer beetle on an ash tree, the rings in tree wood, even the edges of stones or ripples in water. In reality the lines on stones and the water don't exist, it's the transition from one surface to another that we see, examples of outlines or contour lines that help form a shape. 

My sew and slash technique is all about lines - and contrast added using colour and texture. My best works are 4 to 6 layers of fabric. And sewn lines, lots and lots of sewn lines, with slashing between the lines through the top layers. After washing and agitating the fabrics, I am left with surprises about how the fabrics fray and fold and twist, showing off the multiple layers. The thread colour matters - sometimes I want it to blend in, other times I want the contrast. And I sometimes add more lines through beading or couching on yarns or bits of fabric. This piece below was based on the lines in a weathered and discoloured piece of corrugated cardboard. 


Horizontal lines in our art convey a serene point of view, although at times can be static. Vertical lines move the eye, while imparting strength and growth and stability. Diagonal lines add movement, as do meandering lines, spirals, and radial patterns.

The two examples below, both based on Van Gogh's Starry Night, demonstrate how lines can lead the eye. The first example is circles from metallic transfer foil, with stitching on and around the foil. Compare this to the second picture, also using transfer foil and stitching on the circles, but with the stitching leading from one circle to the next. Did you find your eye following that stitching to the next circle, then back again?

The first example was not planned, and when I realized the circles were disjointed and the picture static, on the next piece I changed the stitches to lead from one circle to the next. Much better, don't you think, to guide the eye?


Lines going in two or more directions add much more interesting than when they all go in one direction. This example has lots of horizontal and vertical lines, long and short, not perfectly straight but meandering just a bit. Even the short stitched lines add a needed embellishment to the background. Repetition of lines in this example was key to making the piece work. 

There are oodles of examples of lines in nature and manmade. The artistic eye begins to see, not just objects, but the lines all around us. Try making small (postcard size) examples of the lines you spot, and exploring how the addition of lines, whether stitched, couched, felted etc. can make a difference in moving the eye, defining a focal point, adding vibration and energy, or just a slow, meandering, meditative touch.

REFLECTIONS ON A SOLO EXHIBITION

When a friend applied for an exhibition at a city gallery several years back, well meaning friends told her it was unlikely she'd be accepted as a first-time applicant. So she didn't have many works ready other than those she needed to submit when applying. To her surprise, she was accepted for a solo show. She had just months to prepare.  Her advice to me was to 1) be prepared for anything and 2) have high quality photos for the application. 

Fortunately I had a bit longer to get ready when I was accepted late last year for my first solo, almost 7 months in fact. But no matter how much or little time is available to us, the work will expand to fit the time. And due to Covid-19, I was home more and so had more time to work on my fibre art creations. 
My show has only just opened and runs for a month. Here are some reflections on the experience so far: 
  • I'm pleased with the number of works I was able to make. Of course it is better to have a few high quality pieces that a lot of mediocre ones, and I think I've achieved a good balance. But some almost didn't make it...
  • The one piece I really wanted as high impact almost didn't get done. It took me out of my comfort zone and I had lots of uncertainty about next steps and completion. It would simply sit for days at a time while I pondered possible solutions. When I did work on it, progress was minimal. Despite experimenting with the "icicles" (photos below) months before to get the look I was seeking, it was the last piece to be finished and only one day before the show was hung. It was my stepdaughter who prompted me to finish it after seeing its potential. I realized I had been too close to it to be objective. And I'm pleased to say the piece has received many compliments.
      
  • Learning which items people like most is curious. Some liked my favourites. Others preferred ones I wasn't as fond of. Vibrant colours, high contrast or unusual materials seemed to be top of the list. Next was subject matter. It was heartening to see how many people did take the time to survey each piece of art and their many layers rather than giving any a quick once-over. (See my post on Learning to Look at Art).
  • I didn't hear any negative comments although I did wonder about the pieces no one mentioned.  On reflection, I suspect I included them as fillers or to look like I had a larger body of work. But each in its own way was important in its making: experimenting with a material, exploring a colour combination, or simply a piece that had been calling to me to be created.
  • But it was the ones that took me out of my comfort zone that have the highest impact in this show. The ones I struggled with. The ones I had to keep plugging away on and had fortunately started making early on so had more time to finish. One in particular that was vexing at times, in addition to the Icicles above, was a sunflower piece: see my post on Making Fibre Art Sunflowers Pop.
  • A few years ago I read a review about an art installation in which the art critic talked not just about the art but of the whole experience from the visitor's perspective. He talked of the welcome, the care taken by the organizers to make this not just a show but an experience. When we think about your personal purpose of having an art show, the critic is very right in calling attention to the deeply moving experience he had. An art show is not just about making and showing art and maybe selling a piece or two. It's much more than that. We share our creative side, our messages in the art, our innovations and enthusiasm, we connect with our viewers, we awaken memories, we inspire, we create a welcoming environment. 


A few words on the application and set-up processes:
  • Great photos are an absolute must! That meant learning how to take high quality photographs, getting the lighting right, adjusting the photos. All that takes practice. Some juries will look at the photos on a larger screen so they can see every little detail. Other shows want to jury the pieces in person. The goal here is to first get on the "maybe" list, then on the "yes" list. 
  • In order to have great photos, I needed to have high quality art. That means I needed to be accomplished with the techniques, but also have an eye for and good understanding of composition and design. 
  • My theme was important too, and not easy to write in just 50 words. The theme means a cohesive show of art. Until now I was never interested in working in a series, but that is what galleries want. And I realized that isn't as restrictive as I had originally thought. My primary technique remained the same with each piece, and my series built one upon the next within my theme as I continued to create and ask "what if" for the subjects within the theme.
  • Find out if someone from the gallery will be directing set-up, or if arrangement of art is up to you. There was a volunteer available if needed for my show, but it was left up to me to decide what to hang and place where. I had brought along a good friend who has much experience with hanging shows. Her advice was very welcome and sound, and this would not look as good without her input. 

A show of this type takes months to plan and prepare for, and it feels wonderful to see it all come together. And now that I have much more time on my hands I can get back to a few things I've been neglecting. And to decide what project to take on next.

Related Posts:


(Note: I have switched to follow.it. Follow.it notifies you each time I have a new post. Check them out as they have a huge variety of articles that can be followed on all sorts of topics. Please sign up today to follow my blog.)

A FIBRE ART WASP NEST

One of my fibre art goals this past year has been to create three dimensional work. I'm pleased to say I'm learning more with each piece I make, but this one I'm most pleased with to date. I've been experimenting with various materials that could provide a solid and sturdy structure for 3D work, including layering techniques, foam, wire, metal, cardboard, and other lightweight items. Most recently I tried buckram, used in wearables such as hats and costumes and for items such as bags and totes.

My plan was to make a wasp nest from a variety of recycled fabrics: lace, linen, old sheers, cottons, on a base of buckram, and in shades of beiges and greys. I tore long strips of each, machine stitched the strips together down the middle and on both sides, then cut through to show the layers below. I then handstitched the strips together while forming them into a circular shape, tacking some layers back to show the textures and colours below even more. The buckram gave the structure the strength and flexibility needed so I could form it into the typical spherical shape of wasp nests. 

Since real wasp nests look papery and are made from a wood pulp (the wasps chew wood into a pulp then stick it together with saliva), I added a few small pieces of birch bark as an embellishment. 

As I pondered how best to display my fibre art wasp nest, the idea to hang it from a branch seemed perfect. I checked out TextileArtist.org to review their article on hanging and displaying textile art, and first tried attaching invisible hanging wire to the branch. But after finding the wire difficult to work with, I instead used a cord that was in my stash that has a similar organic look to fabrics used for the nest. And as the nest is very lightweight, it worked perfectly.


IDEA BOARDS TO STIMULATE CREATIVITY

Do you keep an idea wall? I had so many project ideas rattling around in my head and, not able to remember them all, needed a way to capture them for safekeeping. Like many, I have tons of photos on my phone, several of which I refer to for art projects. I also used to write notes when ideas popped into my head, but couldn't keep track of all the notes. Computers and post-its may be an easy storage system, yet are easily lost. 

Seeing potential creative content at a glance - on a wall, in a frame, captured in a binder - boosts the the creative process - we can see the big picture, see how pictures relate, quickly dismiss parts that don't work. There's a reason that filmmakers and designers use storyboards and design boards for their projects.  

A wall is ideal, or even a partial wall, to post photos, words, small sketches, anything we don't want to forget. Because of a lack of wall space, I converted an old frame for this purpose, painting it white, adding string to the back, and using clothespins to hang up my ideas. 

I also started a chalkboard list - specifically to capture thoughts on projects that are in the works - a next step, an idea to try to incorporate - steps I don't want to lose sight of it but also may not get to for a while. Keeping all these thoughts on display is inspiring and helps bring perspective to my works. 

A binder can be a great way to capture design element concepts that tickle the imagination and emotions.  These provide prompts when we are stuck for next steps on a project. My binder is broken down into the several sections, with removable sheets I can prop on a counter or hang in my idea frame, and includes photos, images from magazines, sketches, samples I have made when testing an idea or learning a new stitch. 

  • interesting new colour combinations I had not thought to use previously
  • lines (the lines in bird feathers, the ripples in sand, the spokes on a bicycle wheel)
  • shapes (a fern unfurling in spring, a turtle shell, graffiti letters, a map)
  • form (an acorn, mushroom, bowl)
  • value (sunsets, lightning against a dark sky, shadows, a porch light at night)
  • texture (a stone wall, tea fields)
One photo I kept coming back to was of  a crumbling stone wall in an old Kingston building. I'm now just starting to work on a fibre art piece of parts of that stone wall, inspired mostly by the texture but also the colours. 


I'm now converting my photo into fibre art - this is just the start and is very much a work in progress. I used the faux chenille technique (fabric slashing), different fabrics for each brick, and am embellishing through hand stitching, beading, heat distressing and more. 


I also wanted to share photos of a show which just went up December 1st at the Stittsville Public Library in Ottawa, by the Out of the Box Fibre Artists. The theme is 2020: Year of the Pandemic and includes the items on the wall and in the display case. My piece is the orange labyrinth - front and centre! - also using the same stitch & slashing technique. I added some beading and some small stones to complete the piece. The show is on until the end of December. 


Visit my website: www.needleartsonpaper.com


RECYCLING FABRIC AND OLD TEXTILES INTO FAUX CHENILLE

I have a stash of old fabrics and thrift store textiles I've collected over the years, not sure what they would be used for but knowing they would get used up one day. I'm pleased to say I've now discovered the purpose for all these gems: a technique known as "faux chenille", also called "fabric slashing". 

I first tried this technique about two months ago and made 6 cushion covers (see photo below) (the first 2 were test pieces) with a 7th that I framed instead. And I'm now working on 3 different pictures using this same technique. 

Faux chenille includes several layers of fabrics stitched together, then cut between the stitched lines with sharp scissors. But it's the friction of machine washing and drying the sewn & cut fabrics that creates the frayed fabric edges, giving it a chenille-type look. The first time I washed the bundles was a bit nerve racking, but I was thrilled with the result. And it's a great way to recycle fabric scraps and old clothing and textiles. 


I'm learning the different looks that can be achieved based on the various fabric types, and the importance of colour choices - high contrast is most effective for this technique. I thought the spotted fabric shown at right would be great as a top layer, complemented by layers of pink, green and blue, however these latter colours overshadowed the spotted fabric, dulling what had been a fun piece of fabric. But this was part of the learning process, and a reminder to keep colour theory top of mind.


The orange piece below turned out spectacular, with some red, black and blue layers peeking through. As the top layer was from an old orange blouse with delicate embroidery and sequins, which did survive the washing process, I decided it would look best framed and for long-term protection.


Sewing line after line spaced about 1/2" apart and without a guide is great practice for one's spatial vision, and one's machine sewing skills too. Of course the distances don't have to be exact, and some variation adds interest to the overall piece. 

After completing all these cushion covers, I had decided to try making some pictures using this technique.

I chose this photo of a hosta leaf from my garden. After studying the colours in the picture, I selected several fabrics in shades of greens, blue-green and some fushia and purple to add to the edges, then carefully planned out the layers. The stitching and cutting were the easy part, following the veins of the leaf. 

Next came the washing and drying, again a bit nerve racking but also with great anticipation. I could not have been more pleased with the result.

I embellished some of the edges with pink tulle, couched on yarn for vein lines, and handstitched some beads and sequins to represent water drops. 


I'm so inspired by what I've learned so far and with the potential for this technique. It lends itself very well to nature images, and I now have a list of pictures I want to create. I'm part way through one of a Japanese zen garden and another of moss. And perhaps there will be more lichens in my future too.

If you're interested in learning this technique, there are lots of great tutorials online. Just google "slashing fabric technique" or "faux chenille".


NERVOUS ABOUT PUBLIC SPEAKING? HERE'S A TIP

I was honoured recently to give an artist talk on the lichen fibre art piece I had made for the Creative Reactions show in May. The invitation was to speak at a staff lunch & learn session at the Collection Facility of the Museum of Nature in Gatineau and came from the botanist I had worked with as I created this artwork.


The invitation meant I'd be speaking to a group of 25-30 botanists, all experts in specialized fields and with so much more knowledge than me about lichens, even those who couldn't claim to be an authority on lichens. And that left me feeling somewhat intimidated at first.

Since I've had some experience with public speaking and with giving artist talks, I was confident I could deliver an interesting presentation to this group. It would take a bit of preparation however. 

We can look to structure and tips when writing a draft: ensure a strong start, give an outline of what you will talk about, provide evidence to support key ideas, pause after making important points, a wrap up to end, and so on. But none of these would establish my expertise as the artist.

The key - I realized and kept reminding myself - was that I am the expert about my process of creating this piece of fibre art. Me, not them. 

And that was what the group wanted to hear about - how I made each lichen and interpreted it through fibre, why I chose lichens for this piece of art, what I learned through this process, how the goals of art being a visual tool for science were met. I didn't have to be an expert on lichens - just had to have learned enough to reproduce them in a visual format. 

So if you're at all uncertain about giving a talk in public, remember that you are the expert. You, not them. And that the people in the room really are interested in what you have to say. 

That was certainly my experience with the group of botanists I spoke to. They asked lots of great questions, and later welcomed me with open arms to participate - with my art - at their annual Open House. And where I discovered I was able to actually answer quite a few general questions from the public about lichens. Who knew my expertise had grown so much!


A TICKLE TRUNK OF TECHNIQUES

Remember Mr. Dressup and his Tickle Trunk from which he pulled an array of costumes for his skits? I may be dating myself but it was a show I grew up on, and I've always loved the concept of the Tickle Trunk.

I feel like I have a tickle trunk of my own now, only it contains a bundle of techniques I've learned for my art.

I've taken many workshops over the years in techniques and artistic concepts and am self taught in others, working with traditional and non-traditional materials, giving me not only many approaches I can draw upon but an eye to look on almost anything as a surface on which to create and to embellish. 

Sometimes I feel like I have too many techniques in the collection. It can get confusing after all to decide which to use and has left me feeling at times that I don't have a specific "style" for my fibre art.

But I'm learning that I do have an underlying style, the root of all my work. My artist friends tell me they recognize my work when they see it. The image I'm creating determines the techniques and materials to use as the base, then I draw upon additional modes for embellishment and details. Beading may be used for the frothy image of water on a painted background, painted tissue paper for a sky, embroidery for plants and flowers, painted brown paper bag and lace for a background. Thanks to my sister, who had broken her leg last year, I was able to use two of her fibreglass casts as a 'canvas'. 


While I have mastered my skills for some of the techniques I have learned, I am focusing on improving others, rather than adding more to the trunk. But my main objective is to practice building layers with and combining various techniques to add depth and drama to  my pictures, just like the Mr. Dressup's costumes are embellished with hats, shoes & other props, adding to their playfulness and building the character.

The list of techniques I've learned is long enough that I've actually had to write them all down. My "Tickle Trunk" inventory is posted on my studio wall, so I can refer to it anytime to audition the techniques for putting together a script for my art. 


LEARNING TO SEW - ON A SEWING MACHINE!

Although I learned to use a sewing machine when I was young and took sewing in grade 7, the results and the projects I made didn't exactly encourage me to keep trying. 

And although I've had a love of fabrics and a desire to create using fabric and textiles, I rarely used a sewing machine again until a few years ago. Oh, from time to time I'd decide to try and make something simple, but it was usually an exercise in frustration. I didn't take the time to measure properly, the tension always seemed to be off, a needle would break. I had (sort of) learned to sew, but I never learned how to use the sewing machine properly. And so I would put the sewing machine away again until I drummed up the courage to try again. I knew I should be able to do this, I have cousins who are beautiful sewers.  But instead of taking the time to learn the machine, I let a combination of mindset, lack of patience and lack of confidence deter me.

Then about 3 years ago I signed up for a 2-day workshop through my fibre arts group, one where we were learning techniques using a sewing machine. What's that saying?
"when the student is ready....". It was time for me to learn.

Before the workshop, I did familiarize myself with my sewing machine so I could quickly change threads, bobbin, even change a needle if needed. And I had the previous year tried sewing on cardboard and doing other fibre techniques on my machine. The results were okay, but enough that I was interested in learning more.

Through this workshop I learned the limitations of my basic sewing machine, but also discovered it was a workhorse. And, more importantly, I gained confidence in my sewing ability, and learned that it didn't matter if I could sew a straight line, it was the techniques, and the possibilities arising from these techniques, that caught my attention, from couching on ribbons to layering materials, to encasing sequins, all using this machine that had eluded me for years. 


Since then I've used this workhorse more and more, but its limitations prevented me from more experimentation. It was time to trade it in the old model for a new one. I wanted one that would do free motion embroidery, would be able to handle thick materials including cardboard, have an extra wide extension table and, most important, have an embroidery foot, walking foot, cording foot and other useful feet to expand my world even further. 

After researching brands and models, and reading many reviews, I found the one I was looking for. And I realized just how much knowledge I had already gained about tension, needle sizes, thread types and so on.

So now I am playing with the new sewing machine, experimenting, without the frustration I used to get. Well, most of the time - I still need to remember to lower the embroidery foot before I lower the needle so it doesn't jam. And it seems each day I learn something new, like using the walking foot for a piece that is 10 layers of fabric. I can change the presser feet quickly, filling the bobbin is a piece of cake.  I'm playing with the pre-programmed stitches, experimenting with materials, and have actually started to make some of the projects that have been on my list, and which would have taken so much longer had I had to hand-stitch. Now I love hand-stitching, find it calming and meditative, and so will not give that up, but some projects will be faster and I can combine the two.

The piece below is on a blue velvet-like material, onto which I added 3 colours of foil. I then stitched a layer of tulle over top of Angelina fibres, and couched on a blue metallic ribbon. 

This sample is a material slashing technique, made with 5 layers of fabrics stitched together then cut, or slashed, through varying layers. 

This last piece is a variety of fabrics - upholstery, drapery, organza, and old lace, stitched together with free motion straight stitches.


TYVEK EXPERIMENTS FOR 2026

Although I'm not a quilter, I am a fibre artist and do a lot of machine sewing, mostly random, improvised lines and some free motion. My...